Wednesday, March 28, 2012

a parliament of macramé owls

While out in the garden, tending to the...
English Daisies
Watching the blossoming...

Iceland Poppies
And ANXIOUSLY awaiting the arrival of...
Peppermint Pop Roses
There were a Parliament of Macramé Owls!
A couple of weeks ago we discovered the magic of the macramé owl and now we can't stop. We hope you love our modern take on macramé. Using modern materials and, of course, button eyes updates this retro craft.

On a side note, a parliament of owls is the name for a grouping of owls. A few other of our favorite flock names include:
a muster of peacocks
a murder of crows
a charm of goldfinches <--FAVORITE!
a pandemonium of parrots

Monday, March 26, 2012

Button Ornament

It doesn't have to be Christmas to create a delightful button ornament with plenty of sparkle! We used colors inspired by the peacock... deep blue, turquoise, purple, and green.  All you need to have is a Styrofoam ball, pearlized pins, sequins, ribbon, and buttons.
                             

We used a 2.5 inch Styrofoam ball. First, we painted the ball with a metallic blue acrylic craft paint. This keeps white from peeking through any nooks and crannies. Second, we looped a ribbon using a dab of glue and a pin. Then, using pins we just started putting buttons and sequins anywhere there was space.

So simple! But be sure to have enough buttons and pins, this project takes quite a few.

Monday, March 19, 2012

Button Bracelet

Obsessed with buttons we couldn't resist making a button bracelet! This little project was slightly time consuming since we did hand stitch each button to the elastic. Was it worth it? We think so, but you be the judge. 

                                         What you will need:
                                          Buttons 
                                          Elastic
                                          Needle 
                                          Thread

Cut a strip of elastic that will fit your wrist. Stitch the ends together to make a circle. Pick and choose what buttons to use and start stitching them any way you want onto your elastic. Simple, right!?

Here are our results!
We went with a white and gray theme for our bracelet. 
Would you wear this?
We would!


Friday, March 16, 2012

purple hooter

There is quite an owl craze going on right now.

\   /
(*v*)
( V )
''' '''

 So we have made our own macrame purple hooter with button eyes!! Reinventing retro craft techniques is fascinating and we love seeing the cyclical nature of trends. This is our first attempt at creating a macrame owl. What do you think? We think we have found a new craft OBSESSION!
This pattern was adapted from a macrame pattern we found online. CLICK HERE for the pattern. The site, called Alice's Dollhouse Page, is rather outdated, but check out some of the miniatures Alice has created. My favorite is this Harry Potter scene. There is a miniature Honeydukes shopping bag!

Have a peek around the internet and see what others have done with this owl pattern. We especially love this Rainbow Owl and check out this Mini Owl on a Keychain.

Monday, March 5, 2012

Queen Anne's Lace Scarf

I (Lindsay) love to crochet, and Laura would love to learn. I learned how to crochet from a little old lady when I worked at Rose Terrace Assisted Living. I am so glad she took the time to teach me because I have been crocheting ever since. I especially love to make scarves.

When it comes to learning a new pattern I have a hard time understanding written instructions. Thank goodness for everyone who posts crochet tutorials on YouTube. I was looking for a Queen Anne's Lace tutorial when I came across a wonderful YouTube post called Queen Anne's Lace Pictorial posted by Jenny Stark.

I used Bernat Softee Baby in Soft Peach with a Size H8/5.00 crochet hook. It's helpful to know crochet basics when working this pattern: single and double crochet, chain stitch, and slip stitch.

Here are my results!! I love the delicate, feminine pattern!!
Have fun!


Sunday, March 4, 2012

Make Your Own Jewelry Rack!

We don't know about you but when it comes to earrings and necklaces we start with the best intentions to keep them organized and untangled. In reality, our earrings pile on our dressers until we  have to sit down and sort them out once again. Any store you go to will most likely have a possible solution to this problem. But, why buy a jewelry holder when you can make one? 

Transform this...
to this!


First: Find a wire rack. Thrift stores and garage sales are a good place to start. We bought a nice one for 25 cents! And the one above for 75 cents! Or look in your own kitchen. If you have a wire baking rack that you don't care for, use it!  

Second: Decide what color you want to paint your rack. We find spray paint is the easiest way to go. Decide if you want to glaze after you paint. Decide how you want to hang your rack. Ribbon? Wire? If you are using wire, make sure you have a nice pair of wire cutters. The pair in the picture, as you can tell, have seen better days.

For our rack, the base coat was Rust-o-leum's Flat Brown. Follow paint can instructions for best results. Then, using the foam brush we glazed with Martha's Medallion Metalic Glaze.  The wire is a thin mechanic wire that happened to be around. We used the E-6000 to glue on accents. You can find these things in home improvement stores and craft stores.

Third: Get creative and have fun! We added button accents, of course! And made wire S hooks to hang necklaces!

Last: Tada! Hang your new jewelry rack wherever you want to display all your beautiful earrings and necklaces!


Wednesday, February 29, 2012

leap year birthday

Today is my (Laura) husband's birthday! That's right he's a leap year baby. He's only 7.

Click here for the E-card at someecards.com

Tuesday, February 28, 2012

mid-century modern

Laura and The Tiki Chick just came back from Modernism Week in Palm Springs, California. Palm Springs is a treasure trove of Mid-Century Modern design. 

We boarded this double decker bright yellow bus for an Mid-Century Modern architecture tour. We lucked out on some fabulous weather, a nice 80ish℉. Supposedly it was 100℉ a few days earlier. 

A not so Mid-Century highlight - ROBOTS! The owner of this house created larger than life robots from found objects. The painting of the robots in one color creates cohesiveness. The neighborhood is supposedly up in arms about the robots and the fact that every Christmas there is an over the top light display, but we love it!

A favorite Mid-Century Modern stop was this William Krisel designed home. Look at that landscaping (also designed by Krisel)! Geometric shapes, colored hardscape, and desert plants embodies the spirit of Mid-Century Modernism, even though this is newly renovated.

Color is a huge part of Mid-Century Modernism. Aquas, oranges, bright green. We are going to have to play with a few of these in the upcoming weeks.

Tuesday, February 14, 2012

valentine's day cards

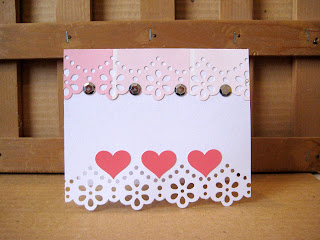
For Valentine's Day, we created a couple (or 3) of cards for the ones we adore using some of our favorite supplies.

cardstock {we use so much that we purchase it by the ream}
paint chips {so fun to use, come in hundreds of different colors, and FREE!}
sequins {for that *sparkle*}
buttons!
paper punches:


Monday, February 13, 2012

just in time for valentine's day

Try this easy pop up papercraft for a last minute, but looks like you spend a lot of time Valentine's Day card.

 fold a piece of cardstock in half (you can use regular paper too)


make parallel cuts at the same height about 1/4" to 1/2" wide. 
you can make them wider if you want to. 
do about two to four sets at different heights. 


fold up and crease


flip entire card over and fold the other way too. 
lay the strips down flat and open your piece of paper.

 
push up the strips like this. 
it is a good idea to fold the card shut to make sure everything lays flat.


adorn the strips...


...like this. adhere another piece of cardstock to the back and voila! pop up magic.


And because Valentine's Day heralds in the upcoming season 
(and Laura is a little obsessed with her new garden)...
Spring is SPRINGING!

Saturday, February 11, 2012

florals

Just a few inspirational shots to get the creative juices flowing. These were taken after work, today!


These tiny cactus flowers are truly *magical*.

There's something about this all over floral that just makes us :)


Who doesn't love PINK?


Monster Yucca!

Friday, February 10, 2012

heart doily

Roses are red...


This primrose is blue...


Paper doilies can be stuffy, so here's an easy DIY version for you!


Fold up a piece of paper as if you were making a snowflake and punch like crazy. We used three different sized hole punches and did some punching in clusters of three. Unfold, then fold in half, and cut into a heart. TADA!

By the by, we bent a cheapo hole punch trying to do this (or we have super strength). So, spend a few extra dollars and get yourself a good quality hole punch. Lesson learned.

Wednesday, February 8, 2012

a sparkly hello

Welcome to Buttons Make Me Sparkle! We (Lindsay & Laura) love Love LOVE to create fabulous crafts, especially with our two favorite crafty items {Buttons & Sparkles}. On our new blog we will be posting crafty things -inspiration, ideas, tutorials, etc.- and our CRAFT PARTIES! 

Here is a sneak peek of what to expect from Buttons Make Me Sparkle.
A tree for all seasons.